Miss. Hillary Strain

Archive for the category “Learning Project 2”

Look out! There’s a Dinosaur on the Loose!!!

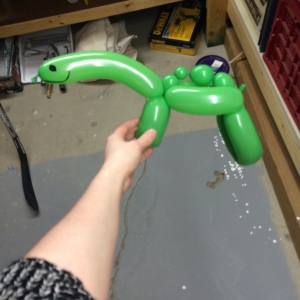
This Dinosaur balloon animal was by far one of the hardest animals that I have made thus far. There was a bunch of different twists, bubbles to hold where my hands weren’t big enough to keep in place, and things that wouldn’t stay in place when they were supposed to.

To learn this Dinosaur, I used the same website as I did to learn the swan, found here, I used a youtube video (below), which was very hard to understand/learn from as there was no talking was very fast paced and loud music playing, and I did a little improvising of my own to make it work when I didn’t understand how to do what the instructions said.

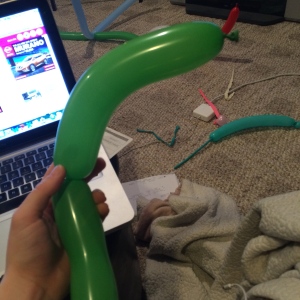
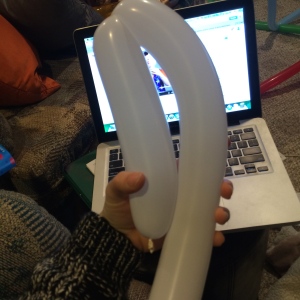
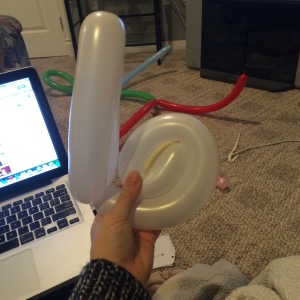
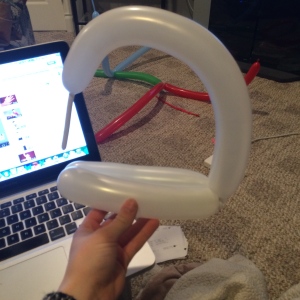
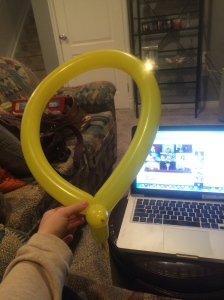
Step 1: Blow up the balloon and leave about a hands length of air in at the end.  The end of the balloon where the knot is, fold the balloon down so that is parallel against the stem to whatever length you desire. Squeeze the folds together for about a minute, this will again create a little bend/curve in your balloon which will be the head/neck of your dinosaur.  After you are finished squeezing and have the head/neck formed, create a twist at the bottom and and hold it in place.

IMG_3211_2

IMG_3212


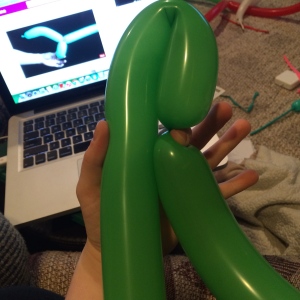
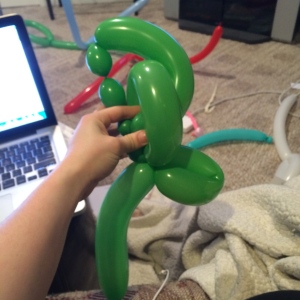
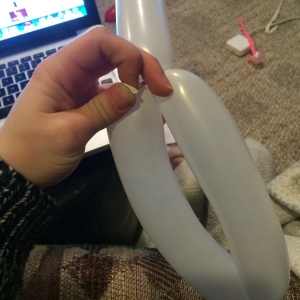
Step Two: Where you made the twist and are holding it in place, fold the balloon down so that it is parallel agains the stem once again, this time keep folding it down a little further so that you have about two inches of balloon above the twist (you are forming the legs).  Where the balloon is twisted from earlier, you are going to take that part of the balloon (where my finger is) and you are going to twist the balloons together (Just like we did when we created our dog).

IMG_3213 IMG_3215


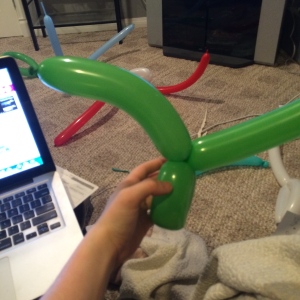
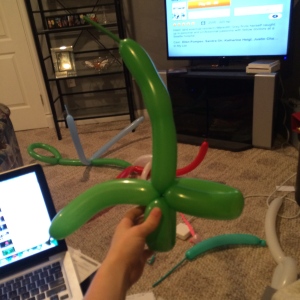
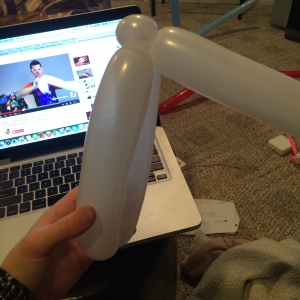
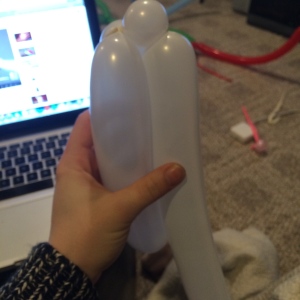
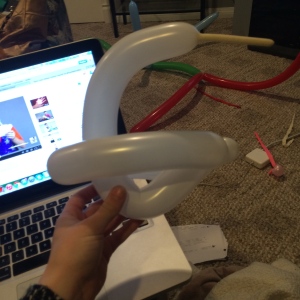
Step Three: To form the body, fold the balloon again towards the face/neck/feet.  Where the fold of the body meets up with the middle twist of the legs and neck, you are going to twist the body into that same twist and lock it into place (Your animal will look like the second picture).  From here, you will have the stem sticking straight up.

IMG_3216 IMG_3217_2


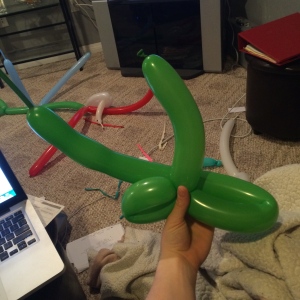
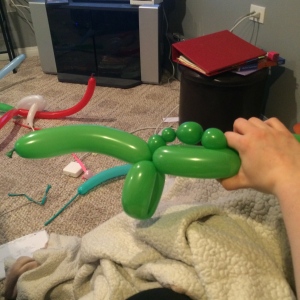
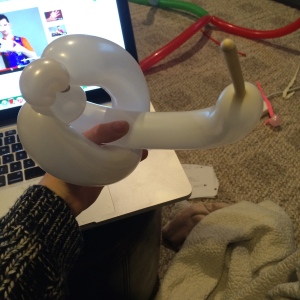
Step Four: This step you are going to create the “spikes”. This part is very tricky as the circles are not locked in place. You can make as many bubbles as you want, as long as it fits the length of the body that you formed.  To create this, you are just going to choose the size of bubble you want, make a twist, and then repeat.  After you are done creating your spikes, you have to fold the rest of the stem underneath the body and push it through the middle of the hole.

IMG_3218 IMG_3219


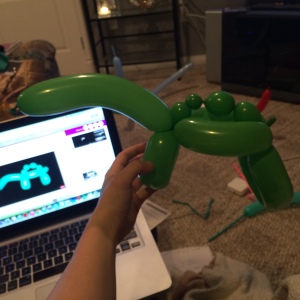
Step Five: Where the two meet, form another lock twist to make the second pair of legsIMG_3220_2
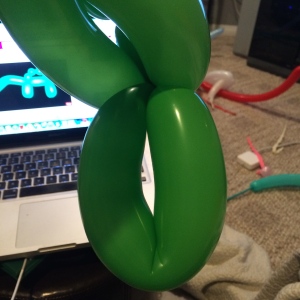


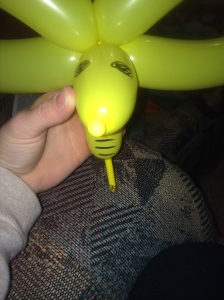
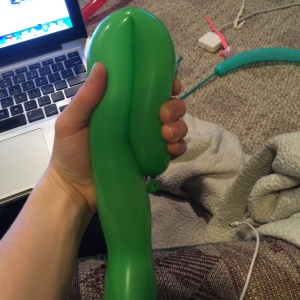
Step Six: Volia! Your Dinosaur, you can draw on some eyes and a smile and you’re good to go
IMG_3221 IMG_3222

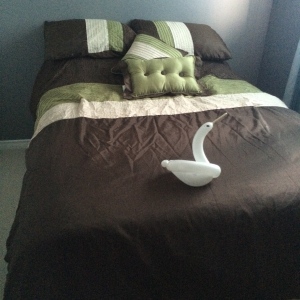
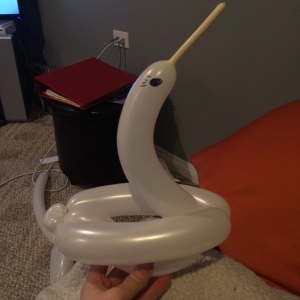
Swan towel? No, It’s a Swan Balloon!

Imagine, you’re on a plane heading to Hawaii for a nice relaxing vacation. You finally land, arrived at your resort, walked into your hotel room and the first thing you see is a nice Swan creation on your bed. But, it’s not an ordinary swan creation made out of towels, it’s made out of a balloon! IMG_3207

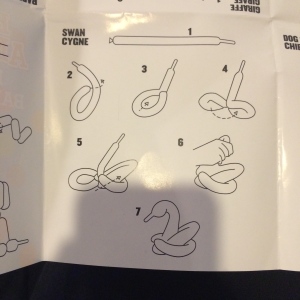
To create my swan, I used a website, which you can find by clicking here, and youtube video/page out of my booklet that came in my started kit, which are posted below.  Once again, the website helped me read and completely understand what I was supposed to be doing as the Youtube video was very fast paced, didn’t explain things well and expected that you knew everything in order to create this. Something that I didn’t know what to do that was required for this type of creation was an ear twist. An Ear Twist is another type of twist that is used to help keep the balloons locked into place.

IMG_3206_2

Step One: You had to blow up the balloon and leave about a fist length of room at the end to create the beak.
IMG_3195_2

Step Two: At the end of the balloon where the knot is.  Make a bubble about the size of two hands and do a basic twist to hold it in place, from here bend that bubble so it is parallel with the rest of the balloon and where the two meet twist the two together to make the two lock in place (just above the knot).  To ensure that the two bubbles are locked into place, take the “String” of the knot and push/pull it through the centre of the two bubbles.  
IMG_3196
IMG_3197_2

Step Three: Where you just locked the balloon circle in place, you need to make a little tiny (about an inch) “bubble” just underneath the lock. From here, you are going to fold the straight balloon down so it is parallel with the other balloons.

IMG_3199IMG_3198_2

Step Four: This is where the EAR TWIST. comes into place. As you can see in the second picture below where everything is lined up and the little bubble is on top, you are going to pull the little bubble up a little bit and twist it around ontop of it. This will secure/lock that little bubble into place on top of both of those parts of the balloon, one on each side of it.  You will now have a circle (looking like the base of the balloon hat we made earlier), a little bubble, and then a long stem.

IMG_3199

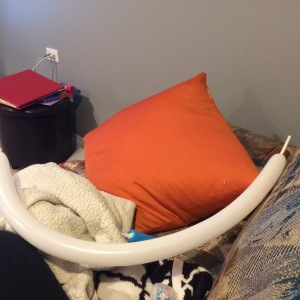
Step Five: Take the long stem and twirl/roll it up until it touches the little bubble. This will kind of look like a snail. You will hold it here and pinch it together for about a minute. What it is doing is making the balloon bend.  After that minute, you will let go and the long stem will now have a curve.

IMG_3200_2IMG_3201

Step Six: You are going to push the curve through the middle of the circle.  Make sure there is a little bit of a curve left underneath of the balloon. The rest of the curved part of the stem will be left standing up but unfortunately it is backwards.   

IMG_3202_2


Step Seven: The final step is to make sure that the swan’s neck/face is turned the right way so there is a final twist to do. In the first picture below, where my thumb is, you are going to do a basic twist. DO NOT twist it with the body as that will affect the shape. So just so a basic little twist to make it face the other way and Voila! You have your swan.  You can add eyes/eye lashes to give the animal some character.

IMG_3203IMG_3205_2

Made a new friend..

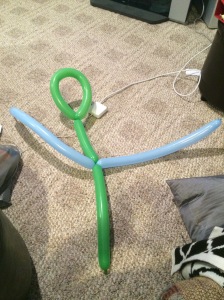
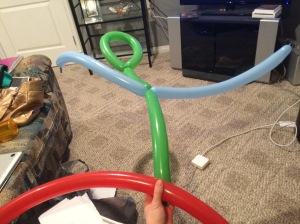
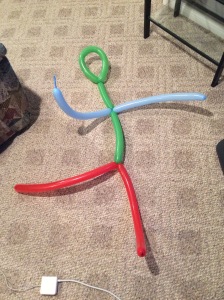
This week, I deiced to do something a little different for my learning project! I decided to do my own “inquiry” project and apply what I have learnt thus far to create my own balloon stick man!  I didn’t do any research or look at any videos to create this. I just did it all on my own, using my imagination and knowledge that I have learnt thus far.  I used 3 balloons to create this person and I just used the basic “Twist and Lock” technique to hold them in place.

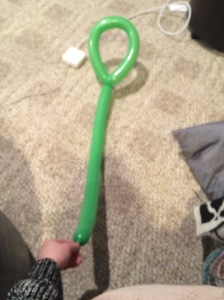
Step 1: Create the Head/Body (green balloon).   To do this, I blew up the balloon almost all the way (I left above an inch of room at the end of the balloon to allow the air to move there after the twist). I took the end of the balloon, where the knot is, and folded it to form a circle towards the body. Where the knot and the body met, I used the “string” of the knot to twist the two parts together to form the head and to hold it in place. There was a little bit of room left at the bottom of the ballon, this ended up being perfect as it’s what I used to twist on the legs!
IMG_3179

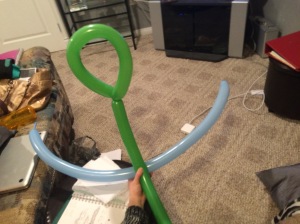
Step 2: Create the arms (blue balloon).  I blew up the blue balloon and left about a hands length of room at the end of it to allow air to be pushed to after the twist.  I realize now that that is way too much room to leave, I could have left about a half an inch and would have been good.  So after I blew up the balloon, I placed it underneath the body where I felt was the right place for the arms to be (about 1/4 of the way down) and centred the body in the middle of the blue balloon so it was proportioned. I then used the basic twist again to twist the two together.
IMG_3182IMG_3183

Step 3: Create the legs (red balloon). Since I learned from my mistake with the arms, I decided to blow up the red balloon all the way for the legs to be successful/look good.  So once again, just like the arms, I lined up the middle of the blue balloon so that the legs would be even at the end little tip that was left in the green balloon. Once I lined them up, I then used the basic twist again to twist the two together. This finished the person and it looks great!!

IMG_3184IMG_3185


So my first ever solo balloon creation was a success! Yes, there were some little mistakes and bumps in the creation but I feel like it turned out alright! What do you think??


Hat days are the best days

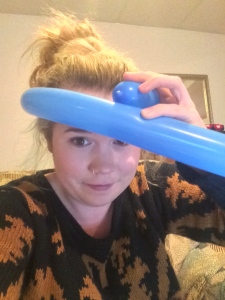
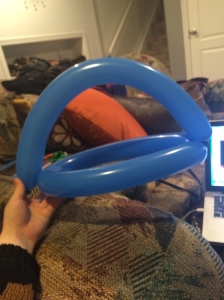
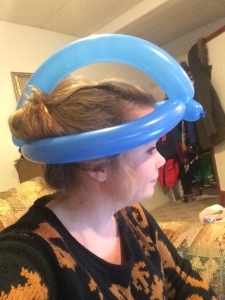
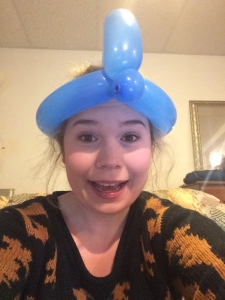
Who isn’t a big fan of hats?! They are perfect for bad hair days, for greasy hair days and really now they are just a part of  a persons’ style! So finally, I decided that I would try to attempt to make a hat. This has always seemed challenging to me so I decided to do the Basic Balloon Helmet Hat.  This only uses one balloon and was actually done in three easy steps!

I used the following Youtube video to help me create the hat and I also used this balloon making website that had step by step instructions along with pictures that helped me learn how to do it as well.

There were 6 steps that I had to follow:

1) Blow the balloon up all the way – You can leave a little bit of space at the end if you like but it is not  needed.

2) Take the balloon and size it to your head. Just wrap the balloon around your head and make you mark where the two ends touch because that’s where you’ll make your first twist.

IMG_3128

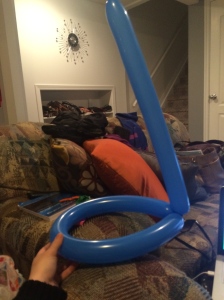
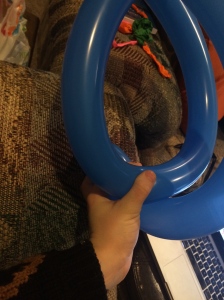
3) Where you landmarked your measurement, twist the two ends together, this will form a little bubble at one side of the circle.  That will be the base for your hat. At this point you will have a circle (where your head goes) and a long stem looking like thing coming out of it.

IMG_3129

4) Take the long stem and arch it over to the opposite side of the circle.

IMG_3130_2

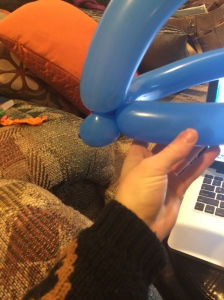
5) Where the stem and the side meet, create a bubble at the end of the stem and then fold it underneath the the side of your circle and start folding it upwards, afterwards twist the two together.

IMG_3132_2 IMG_3131 IMG_3133_2

6) Voila! Your very own hat.

IMG_3135 IMG_3134_2

Who doesn’t love flowers?

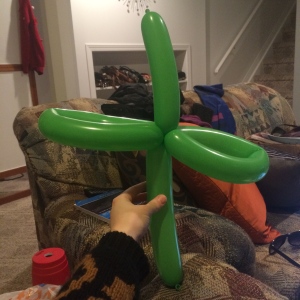
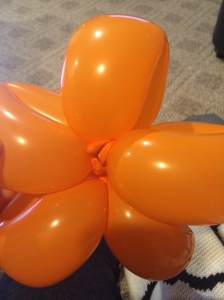
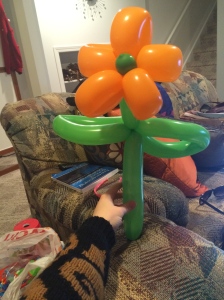
In spirit of the beautiful weather we’ve been having lately, it inspired me to make a beautiful daisy flower. Spring is clearly on it’s way and there is nothing more that I love than watching all of the flowers grow in my mom’s garden.

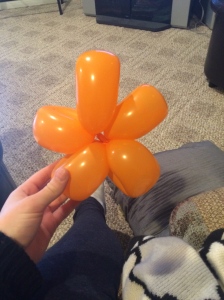
I decided that it was time for me to pick up the pace with my balloons and make it a little more challenging this week by trying to do a project with two balloons.  Well, was it ever challenging!!  This flower used two balloons, and the air pressure/amount that you put in had to be spot on or else there would be complications (aka. popping).  This took me four attempts to do and although my final results were not that great I’m still proud of myself!   Unfortunately I forgot to document my first two attempts, but here is my third and fourth.

I used the following video two help me create this balloon masterpiece and it actually helped a lot! He was very descriptive and gave a lot of hints and tips.  Only downside was that he did it very fast paced so thank god for the pause button and the rewind option! ha ha

There was a multiple amount of steps on both balloons that I had to take in order to create the flower.

The Stem – First balloon (green)

1) Blow up the balloon all the way so there is no air left or room left in the balloon.  BEFORE you tie the knot, let some air out of the balloon – this part is key as it allows the balloon to be more squishy and easy to fold.

2) Fold the balloon into a “Z” ontop of each other but make sure that both ends of the balloon are longer than the twist part on each side.

IMG_3108

3) Twist in the middle of the Z, this will create your stem.

4) Manipulate and form into a shape of the stem.IMG_3109

5) Make a little indent in the leaves.  You do this by folding the leave upwards and then massaging/squeezing it into place. This will make a little bend in your leaves to give it some character.

It's very hard to see, but there are little bends in my peddles. I did have a little too much air in these peddles so for next time I would let out more air in the beginning so I wouldn't have as much pressure.

It’s very hard to see, but there are little bends in my peddles. I did have a little too much air in these peddles so for next time I would let out more air in the beginning so I wouldn’t have as much pressure.


The Peddles – Second balloon (whatever colour your heart desires)

* I also used the following website to help with creating the peoples, I found it a little easier to read after I listened to his video. *

1) Blow up the balloon and leave about 1/4 of the balloon unfolded. Again, let some air out of the balloon before you tie it.

2) Hold the balloon straight in a vertical line in front of you with the knot end pointed up. Starting at the end where you tied your knot,  fold the balloon so that it lines up parallel with the line (You can make this whatever size you want, I did mine small so that I had small peddles).

IMG_3112

3) Where the two meet, twist the two sides together.  (Instead of twisting the two blown up parts, I ended up twisting the straight line with the knot).  TO MAKE SURE this peddle stays in place, pull the knot end through the centre of the peddle (circle) that you just formed.

Here you ca see where the knot is pushed through the middle of the circle and is pushed down a little so it is out of the way.

Here you ca see where the knot is pushed through the middle of the circle and is pushed down a little so it is out of the way.


4) Continue step 2 however many times it takes to use up your entire balloon. Once finished, manipulate/form the peddles into a circle.

IMG_3113 IMG_3114 IMG_3115

Unfortunately with my first one, I didn't blow up my balloon enough so I couldn't create another peddle, so unfortunately this one didn't work out.

Unfortunately with my first one, I didn’t blow up my balloon enough so I couldn’t create another peddle, so unfortunately this one didn’t work out.

IMG_31215) Push in any extra balloon/room that you have into the centre of the circle of peddles that you formed.

Here you can see where I pushed the little bit of extra balloon into.  I actually had to tie another knot in it in order for it to stick.

Here you can see where I pushed the little bit of extra balloon into. I actually had to tie another knot in it in order for it to stick.


Putting the two together

1) At the top of the stem (where it is not a knot) form a little bubble in the end by twisting it around.

2) Take the bubble at from the stem and push it through the middle of your circle of peddles making sure that the bubble pokes through and is sitting in the middle of your circle.IMG_3119

Since the first one didn't really work out, I never had a big enough centre of the peddles to push the bubble through, thus I had to squeeze the stem into the side of the peddle

Since the first one didn’t really work out, I never had a big enough centre of the peddles to push the bubble through, thus I had to squeeze the stem into the side of the peddle


Here you can see where the bubble from the stem wash pushed through.

Here you can see where the bubble from the stem wash pushed through.

IMG_3126


3) Make a little bend on the stem so that the flower isn’t sticking straight up.

IMG_3117 IMG_3123

Balloon Bumblebee with 1 balloon

Today I was really missing warm weather and was hoping that spring would come soon.  What comes with spring?  Well, bumblebees! In spirit of my spring wishes, I decided I would make a bumblebee.  Unfortunately, what I noticed is that there wasn’t make tutorials on how to make simple bumblebees.  The only tutorial that I found was a youtube video (posted below).  I do enjoy using youtube videos as they are a good visual and they allow me to see what it actually is supposed to look like during the process, the only downside to them is that they are usually done really fast and I need to pause them frequently to rematch the step and make sure I’m doing it right.

I formed my bumblebee in 6 easy steps:

1) Blow up the balloon and leave about a first length of room at the end.

This allows enough room for the air to get pushed to and will also be the bee’s stinger.

 2) Make one bubble at both ends of the balloon, afterwards bring the two together so that they are side by side

One at the beginning of the balloon where you tie it and one at the end of the balloon where you leave room for air to get pushed to/the stinger

IMG_3042

3) Twist the two bubbles together to form head and body – the rest of balloon will be in a circle. IMG_3043 4) Pinch the middle of circle and bring that part of it towards the head/body. IMG_3044 5) Twist the pinched part of the middle of the circle into the body to form the bee’s wings. IMG_3045 6) The fun part… Decorate!  You can add stripes to the body, draw two eyes on the head and draw the end of the stinger black! IMG_3040 IMG_3041 There you have it!  A balloon bumble bee.  Here’s to hoping spring comes soon. Any thoughts on what I should make next?  Maybe I should step up my balloon game and start making animals/objects with two balloons.  What do you think?

Balloon Sword

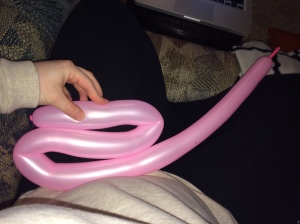
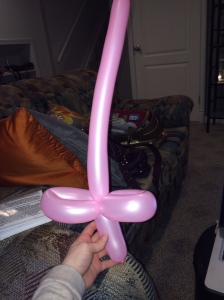
My second balloon creation was a sword.  When I first saw this sword, I thought it was going to be quite tough because there are a lot of bubbles/manipulations in the same area.  Was I ever wrong!! This sword was easier to make than the dog that I first learnt how to make!

To help me make this, I used Christian Armour’s site tutorial.  Click HERE to view the page that involved step by step pictures and explanations how to make the sword.   I also used the following youtube video which didn’t have much explanation but gave me more of a visual and understand on how exactly to twist the sword and what to do.

There were four basic steps that I had to follow to create the sword.

1) Blow up balloon (the obvious) and leave a little bit of room at the end of the balloon to help the air get pushed through while twisting.

When I first did this with the pink balloon, I left too much room at the end so when I finished my sword there was still a part of the balloon that was empty. It looked pretty weird having a little pokey part at the end.  I made another sword, the green balloon, and cut it quite close to having no room, so it ended up being perfect! (See image below in step 4)

2) Fold the balloon three times (at the bottom of the balloon where you tie it) so that you form a “Z”

IMG_3036

3) Twist right in the middle of the three folds.  This forms your handle and the two sides.

This step was quite terrifying because of how big the balloons were and how much pressure I felt while folding.  I also don’t have big hands so it was difficult to get a grasp on both sides of the 3 folds of the “Z” to twist them right in the middle. Luckily, I was able to do it and all the air did get pushed to the tip even though it was folded in 3 different places.

4) Form the sword into place.

I noticed when I was twisting the “Z” in the middle, it actually formed the handle itself. I just had to push the blade part of the sword into the middle of the two circles. The pink balloon is the first sword i made that I left some room at the end (unfortunately my picture cut it off but if you refer to the picture in step two it was very close to  the same size).  The green is the second sword i made.  There was still a bit of room left for air but not quite as noticeable.

IMG_3037IMG_3039

There you have it!   I officially know how to make a sword.  This could be useful if I were ever hosting a carnival event or birthday party.  It’s very quick and easy to make and I’m sure both, boys and girls, would love it!


Finally a successful dog!

Hi all!

It’s been awhile since I’ve posted for my learning project, but don’t worry this post won’t disappoint! I was busy doing some research on how to make sure that my balloon won’t pop, because I have had a lot of times where it would pop mid twist, and just different techniques to make sure that the twists and shapes will hold.

I’m starting to get used to the fact of twisting and working with these balloons, they’re not as sensitive as I originally thought they were!  I also found a few techniques/tips to help make sure that popping won’t occur. The first thing that they suggest is to stretch out your balloon before you even start blowing it up, this will allow it to have more flexibility and it makes it easier to get air inside and twist/move around the balloon and air inside so it doesn’t pop. What you have to do is NOT blow up the balloon the whole way, leave about a hand grasp worth of room at the end of the balloon. This will allow enough room for all the air to move back into it and the balloon will expand while you’re twisting instead of creating more pressure and impact!  Something else that I’ve noticed I improved on, which is very minor, is actually tying the balloon shut!  When I first started making and working with these balloon animals, I had the hardest time trying to tie the balloon. It was always too tight and I didn’t want to let out too much air and it just wouldn’t happen for me. After watch the following video, click here, I realized that a main exercise he does is really stretch out the the opening of the balloon which allows it to have more flexibility making it easier to tie.  I started doing this technique ever since and I’ve been successful every time.

Using these techniques and tips that I learnt above, I decided that it’s time to final make a completed dog balloon animal! One of the biggest types of twisting and shaping that they use to make the dog is called the Locking Twist. Overall what it is, is you create 3 “bubbles” by just twisting the balloon normally. You will take the second and third bubble and line them up side by side, and then start twisting the two together. Once you twisted the two together you can incorporate the first bubble in the twist as well.  Having the double twist on the balloons will allow it to lock in place.

I mainly used the follow site and youtube video to help teach me how to create my balloon dog. These two resources were quite helpful, the website more than the video as the video was too fast for me to keep up to, but I was eventually able to create my balloon dog successfully (after a few tries of course). I guess I kind of used a mixture of both to create my dog, as the website was a little hard to visualize exactly how it was supposed to turn out but was in a lot of detail, and the video gave me my visual but was too fast with it’s explanations.

My first attempt wasn’t successful what so ever as I didn’t blow the balloon up far enough in the first place. I was worried I wasn’t going to leave enough room for the balloon to expand, the result of this was that I only enough room to create the ears, face, neck and first set of legs, but not enough room to make the rest of the dog’s body, legs and tail.

IMG_2998IMG_2997

Since I had an unsuccessful attempt, I was determined to make a perfect one.  The next few tries, that I didn’t take pictures or documents of, were unsuccessful as they both popped on me while I was twisting. Finally, the fourth attempt I was successful! I finally created my dog!

I stretched out my balloon enough before the fact that allowed it to be more flexible for the air and the twisting, I put more than enough air in the balloon but still left enough space for leeway and all my twists held and were perfect! In the pictures below, you can see that I blew up my balloon a lot more than my first one as after making the front of the dog I have more than enough room to make the body and end.

IMG_3003 IMG_3001

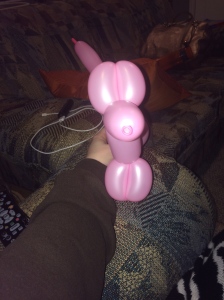
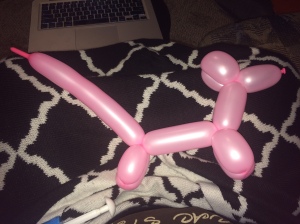
Here is what my final dog looked like!  I named him Spot.
IMG_2999

Please check out the video below that I made. It is a video of my creating another dog without using any instructions and just using my knowledge that I’ve learnt throughout this process.  Let me know what you guys think and if you have any tips or ideas on what I should do next!  Please watch until the very end, I promise it will be worth it. You’ll get a good laugh!   Also, please don’t mind my facial expressions, I’m still in the process of getting used to the pressure while twisting and after getting popped on a few times it’s a little nerve racking ha ha.

That’s all for now folks, until next time!

Thanks for reading/watching.


Balloon Animals/Things

Hello Everyone!

Well, I have finally decided what to do for my learning project. It’s an exciting day.  Actually, the idea came from an older gentleman at a restaurant the other weekend.  When I was home last, my parents and I went out for supper.  There was an older man there who had a meal, just like the rest of us, but once he was done, he went around to all of the tables that had young children at them and made them all balloon animals!  It was honestly the cutest and neatest thing that I have ever seen.  The look on the children’s face when he made them the animal they wanted, it was either a mouse or a dog, was priceless and I could tell that the gentleman felt good about it as well.  Being able to witness this is what inspired me to learn how to make some myself.

Balloon Kit

Not going to lie, I have always wanted to make them myself but I have never thought of trying and never really had the ambition to. I decided this would be the perfect opportunity to finally try it out.  To get started, I realized that I needed an ample amount of balloons and probably a balloon pump.  I decided to go check out the local store, Party City, and they had exactly what I needed!  They had an animal balloon started pack that came with 40 balloons, a balloon pump and a book of directions to make animals.  This was the perfect buy!  I was looking into the direction book that the kit came with, and it is actually quite complex. It doesn’t really seem quite fit for a beginner and the instructions aren’t that clear, but I know that it will be a little more useful in the future.
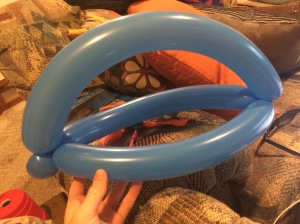
What I know:  To be honest, I know nothing about balloon animals. I know that the animals and objects look quite easy to make but it’s actually a very challenging hobby.  The only thing that I know how to do is create a snake, a snake with it’s tongue sticking out and I know how to twist a long balloon to make little “bubbles” on it.  I feel that I am going to learn a lot with this project.  Also, what I know is that I’m kind of scared of balloons popping around/near me. I’m not the biggest fan of twisting high pressured things that can explode and potentially injure me. So, this is going to be something that I am going to have to overcome but I am willing to do this and make some cool things!  Here is a picture of my first step.  I made a snake with it’s tongue sticking out!

First Try

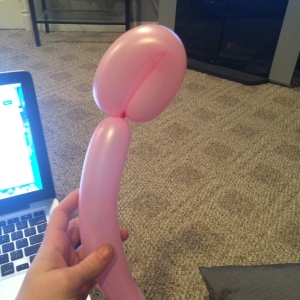
Balloon Snake Well, here is my snake.  As you can see, I left out some air to make room for it’s tongue.  I didn’t use any instructions or nothing to come up with this idea, it was all in my head.  I just used my imagination and what I feel like I already knew.  I just used the little pump that came with my kit to pump it up and then I tied the knot to make the air stay in the balloon.  I know, this seems pretty basic and easy to start out with. But that’s actually all that I know and was my first try without instructions!  I decided to try again. I kept the same balloon but decided to start adding in some twist and different techniques.

I decided to try to start adding some little “bubbles” in my balloon snake to try and transform it into something else.  I just started twisting the balloon in the part where i wanted a “bubble” to form. Well, the twisting part was the easy part, it was the getting it to stay part that was tough.  Once finished twisting the balloon to make the bubble, as soon as I let go, the twist disappeared! The air pushed through the twist and made it come undone.  I tried this a couple of times and got frustrated. I finally decided its as time to do a bit of research to figure out how to make it stick!  I found this website here, “twisting balloons 101” , that showed me the “twist and pinch” technique. This is when you simply pinch the part you want to twist, and keep twisting it in that spot over and over again but in order to lock it, you must intertwine 2-3 parts of the balloon together. So I continued reading about this on the same site as above! Screen Shot 2015-01-25 at 4.33.46 PM By using this technique, and the same balloon that I used to make my “snake”, I ended up making a legless dog!!  I’m pretty proud of myself to be honest.  If you look closely at the picture below, You can see the long nose/face on the left, the little loops at the top are the ears, the long body and the tail! Balloon dog no legsI’d say this isn’t too bad for a first timer!

Things I learned: Tying the knot at the end of the balloon is actually kind of hard because of how little room you get left.  I learnt the “pinch and twist” technique to create little bumps rather than just twisting the balloon. I also learnt that you can’t just expect to make one little bubble here and there and expect it to last. You have to twist it in with another bubble or just not make one at all.  Another thing I learned, that I think I really need to get driven into my head, is that even though the pressure feels like it’s going to explode due to your twisting and manipulating, it actually might not and probably won’t! I just need to calm down and go with it.

I’m excited to learn more about different techniques and ways to make animals/other balloon things, like a hat or sword!
Post Navigation